Anúncios
You’re on a sunlit street, phone in hand, snapping travel photos that capture unique moments. Later, you scroll through them and wish every shot could wow just as you remembered.
Mobile photo editing apps transform those memories, helping users elevate quick snapshots into vibrant, share-worthy images. With just a few swipes and taps, your travel photos can stand out for friends and followers alike.
Dive into this practical guide blending expert advice, hands-on techniques, and clear instructions. Discover how to use your favorite apps to make every travel photo truly remarkable.
Get Crisp, Clear Photos Even When Shooting on the Go
The right approach in mobile editing ensures even hasty travel photos look intentional and polished. A few tried-and-true steps save that perfect shot from blurriness or dullness.
Steadier hands and simple in-app tweaks improve clarity instantly, giving travel photos an edge whether taken in a hurry or carefully composed.
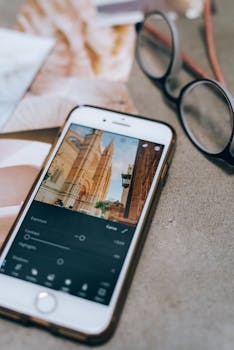
Tap to Sharpen Key Details, Then Dial It Back
Rather than cranking up sharpness, start by tapping “auto enhance” and then selectively add sharpness. Watch where details look natural, particularly with edges and textural zones.
Over-sharpened travel photos lose charm. If edges begin to look crunchy, slide the bar down. Maintain facial softness and focus on fine details, like building outlines or pebbles.
Every app handles sharpness uniquely. Try adjusting while zoomed in to catch issues early. Save a copy before experimenting for easy comparisons across versions.
Use the Crop Tool to Remove Distractions
Cropping isn’t just about trimming. For travel photos, it emphasizes mood and story. Square crops remove distractions, while wide crops showcase context, like bustling streets.
Follow the rule of thirds for instant visual energy. Drag gridlines over your subject’s eyes, a landmark, or the horizon. Double-check for hidden clutter, like photo-bombers or signage.
Test different crops like a sandwich—start wide, cut away, see what the image “tastes” like. When in doubt, save multiple versions to revisit later.
| App Feature | What It Does | Ideal Use Case | Quick Tip |
|---|---|---|---|
| Auto Enhance | Boosts basic color, clarity | Quick fix for dull travel photos | Use lightly as a first step |
| Sharpen | Clarifies fine edges | Great for textures: bricks, leaves | Zoom in to check before applying |
| Crop | Resizes and reframes | Removes unwanted elements | Test different ratios to find best fit |
| Contrast | Defines shadows, highlights | Makes travel photos pop | Add slowly until image stands out |
| Undo/Redo | Tracks changes | Compares edits instantly | Use before saving final edit |
Use Color and Light to Create a Signature Travel Photo Look
Control over color and light gives travel photos style that feels uniquely yours. Small, intentional changes boost mood and reinforce the scene’s natural atmosphere.
Thoughtful use of warmth, vibrance, and highlights easily differentiates your beach sunset from the next.
Balance Warmth and Coolness for Natural Skin Tones
When faces look orange or blue, adjust temperature sliders until skin looks true to the moment. Tap “before/after” to check for overshooting, especially with group travel photos.
Subtle tweaks are key for natural results. Use the color picker if your app offers one. If unsure, nudge sliders in smaller increments and review under different lighting.
- Adjust brightness to keep details visible instead of washing out skies; pull the slider slowly and toggle previews to avoid losing texture or vibrancy in travel photos.
- Use vibrance controls when city lights or tropical foliage lack intensity; enhance without turning everything neon. Check that blues and greens don’t overwhelm the whole travel photo.
- Experiment with contrast for mountain ranges, old city walls, and cloudy skies; raise sparingly, as too much contrast erases soft details that add depth to travel photos.
- Selectively desaturate distracting colors using brush tools or masks when bright signage or clothing steals focus from your intended subject in a travel shot.
- Apply graduated filters horizontally for dramatic sunsets and verticals for architecture; this method echoes professional editing for travel photos on larger screens.
Layering adjustments may take trial and error, so create versions labeled by mood—bright, moody, or classic—then review which suits each travel photo’s intent best.
Fine-Tune Shadows and Highlights in Outdoor Scenes
Use highlight sliders to retain detail in bright clouds or snow. Dial up shadows to recover detail in faces or windows hidden from sunlight in travel photos.
Light adjustments mimic how the eye naturally adapts to different scenery. Preview the photo in full brightness and darkness to double-check for hidden artifacts in travel shots.
- Lift shadows to reveal hidden features, but watch for grain. Undo if faces turn gray or unnatural on closer inspection.
- Lower highlights gently to bring back clouds, yet avoid a dull appearance. Check before/after to be certain the travel photo doesn’t lose impact.
- Tap “auto adjust” for quick balance. Manually tweak to taste if automatic results flatten mood or details.
- Layer low opacity dodging for subtle lighting; test on stone, sand, or leafy vistas in travel photos, ensuring realism remains intact.
- Save progress frequently and name files descriptively for easy comparison and selection during uploads or printing travel images.
Multiple small light changes often outperform drastic swings. Trust your instincts to keep travel photos relatable and inviting, even after creative edits.
Experiment With Filters Without Losing Originality
Selecting the right filter lets you relay a destination’s mood without disguising authentic colors. Use filters as subtle enhancements, not complete takeovers, when refining travel photos.
Distinct filters for coastal, desert, and urban environments help your images stand out but preserve the vibe you experienced firsthand.
Stack and Reduce Filters for Controlled Creativity
Combine multiple filters at half or quarter opacity to achieve custom aesthetics. If a filter is too stark, fade it until only the desired color casts remain in your travel photos.
Record combinations and strengths used. Title presets by location or lighting: “evening market 40%, cool matte 10%”. This approach makes it easy to reproduce the style in future travel photos.
Avoid filters that replace skin tones or make skies fantastical. When a filter changes the reality of the moment, reduce its strength or swap for a lighter touch.
Test Filters Room by Room or Street by Street
Edit indoor market shots differently from bright, sunlit streets. Filters suited to dim interiors don’t always flatter outdoor scenery, and vice versa, in travel photo edits.
When reviewing, hold your device at arm’s length to simulate real-world viewing. Subtle filters should add interest without screaming for attention in travel photos.
Maintain consistency across an album by using the same set of two or three filters. This helps establish a visual story throughout your travel photos, not just within single images.
Keep Evolving Your Skills With Every New Travel Destination
Every trip and app update provides opportunities to refine editing steps, unlock new tools, and develop a signature approach to mobile travel photo enhancement on the go.
Travel photos deserve more than simple uploading. Editing brings a creative edge to your memories, reflecting your journey’s true personality and energy with just a mobile device.
You’ll return home with travel photos that don’t just remind you of places, but instead, make your favorite moments come alive—ready to impress, inspire, and invite viewers along.