Anúncios
Scrolling through your phone, you spot that almost-perfect picture – except the lighting is off. It happens to everyone. Photo lighting fixes are easier than ever with mobile apps.
Digital editing puts fast solutions in your hands. Right lighting can turn flat images into vibrant keepsakes. The best results come from knowing which tools to use and how to use them.
Read on for straightforward, realistic advice on using photo editing apps for quick, professional lighting improvements. This guide is tailored for people ready to sharpen their photo skills immediately.
Tuning Light and Exposure in Mobile Apps Immediately Improves Clarity
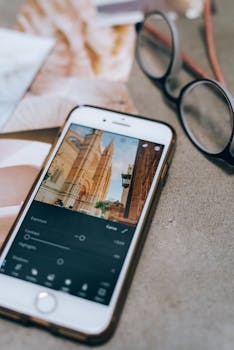
Adjusting brightness or exposure brings shadowy shots to life. Use photo lighting fixes to highlight subjects, clarify faces, and recover photos you thought were lost to darkness.
Every modern editing app offers a brightness slider and an exposure control. Move sliders with intention, watching for details hidden in shadows or lost in glare.
Using Sliders with a Purpose
Aim for natural tones: Pull the exposure slider slowly until you notice facial features or background details pop out. Stop before highlights turn completely white.
When fixing a sunset shot, try raising shadows while reducing overall brightness. It reveals detail in the foreground without sacrificing that fiery sky.
This method fits everyday needs. Open your favorite app, locate the exposure tool, and nudge until the scene matches how you remember it looked.
Spotlight Feature: Selective Adjustments
Some apps support spot or selective lighting fixes. Touch an area, like someone’s face, then brighten just that part. This leaves the rest of your image naturally lit.
Try dragging a small adjustment circle over an underexposed corner. Boost only that small spot and compare it side-by-side with the untouched photo for clarity.
Selective edits are perfect for photos with uneven lighting, such as a shadow across someone’s features. The correction draws the viewer’s eye exactly where you want.
| App Name | Brightness | Selective Lighting | Takeaway |
|---|---|---|---|
| Snapseed | Yes | Yes | Use for precise fixes and local adjustments |
| Lightroom Mobile | Yes | Yes | Ideal for batch edits and RAW tweaking |
| VSCO | Yes | No | Great for quick, global lighting fixes |
| Picsart | Yes | Some | Combine creative edits with basic lighting tools |
| Google Photos | Yes | No | Best for simple, one-tap edits |
Fixing Washed-Out and Underexposed Shots with Quick Filters
Ready-to-use filters offer instant solutions when photo lighting fixes are needed fast. Choose the right filter instead of editing each setting individually for rapid improvement.
Apps categorize filters by mood, time of day, or artistic style. Use these categories to pick a fix that complements the photo’s original intent without pushing it too far.
Spotlight: One-Tap Filter Fixes
Tap a filter named “Sunrise” to warm up a dull morning shot instantly. Or select “Shadow Lift” for pictures taken indoors with little window light for a dramatic boost.
- Choose a filter that brightens without bleaching colors. Brighten faces for group photos, making everyone look vibrant and present.
- Apply vintage filters for outdoor snapshots at noon, taming harsh midday sun and preserving detail in faces.
- Tune intensity: Most filters have an opacity slider. Start at 50% and slowly nudge higher. Watch colors and brightness blend naturally.
- Undo at any time. Never fear trying new filters—if results look unnatural, simply revert. This gives you courage to experiment freely.
- Favorite your top filters. This saves time for future photo lighting fixes—no endless scrolling or remembering complicated sequences.
Smart filter choices make dull images pop, helping every photo tell its story.
Custom Tweaks After Filtering
Filters are just the first step. For perfect balance, try minor manual tweaks afterward, like raising contrast or lowering highlights to tame an overly bright effect.
- Adjust contrast after applying a filter. This sharpens separation between light and dark areas, great for adding realism.
- Drop highlights to recover skies in landscape shots, especially if the filter washes out clouds or distant hills.
- Boost midtones on portraits, revealing skin texture and color for lifelike results. This is crucial for those serious about photo lighting fixes on mobile.
- Refine shadows last. Only lift them enough to see essential details, avoiding a flat, cartoonish look in group shots.
- Always compare the before and after views. Tap the split-screen icon to spot subtle changes and ensure improvements look good in real life.
These refinements transform quick filter fixes into photos that appear edited by an expert, not an algorithm.
Correcting Color Casts and Balancing Whites for True-to-Life Results
Color shifts throw off whole scenes. Tools that neutralize blue, yellow, or green casts deliver accurate lighting—essential for photo lighting fixes at home or outdoors.
All reputable mobile apps include temperature and tint sliders. Together, they restore natural color to skin tones and objects.
Neutralizing Unwanted Color Shifts
When faces look orange after sunset, nudge the color temperature slider cooler. Do this slowly until complexions return to normal without adding a blue haze to shadows.
For blueish indoor shots, increase warmth gradually. This correction makes white shirts look clean and neutral—never orange or green—in every photo lighting fixes session.
Pair tint control with temperature. If window light makes a photo look too green, sliding tint slightly pink or magenta brings balance. Watch small changes make big difference.
White Balance Shortcut for Consistency
Many apps let you auto-balance white with one tap. Test this after manual adjustments. The app scans your photo and sets temperature and tint based on what it detects as white.
If colors still seem off, pick a neutral point. Tap on a gray or white section—such as a t-shirt or sheet of paper—so the app corrects all colors relative to that spot.
For batch editing, use the same white balance settings across similar shots. Batch photo lighting fixes keep your event gallery or trip album looking unified.
Enhancing Shadows and Highlights Without Sacrificing Detail
Sharpening the light-dark contrast highlights key features—great for adding depth to faces, architecture, or anything shot on a bright day. Respect subtlety, so details remain realistic.
Shadow and highlight sliders operate like stage lights. Slide highlight down to recover a blown-out sky. Raise shadow up to reveal faces hiding in deep backlight.
Mini Checklist: Targeted Improvements
Locate the highlight slider first for daylight images. Pull it down just enough so clouds or bright walls look natural again. This is a standard photo lighting fixes step.
Move shadow slider up cautiously, just until you spot eyes and expressions. Avoid full max—color and texture can go muddy if pushed too far.
Mix both if needed: Drop highlights for the environment, lift shadows for people. Compare before/after to keep results balanced and appealing.
Micro-Process: Using Curves Adjustments
The curve tool gives an advanced way to refine contrast: Tap to add a point mid-line and lift that point slightly. This brightens midtones without touching extremes.
Anchor the ends to protect solid blacks and strong whites. This controlled S-curve adds depth. Apps like Lightroom Mobile and Snapseed provide this feature easily.
Try saving a custom curve for future use. Reapplying can standardize your photo lighting fixes and build visual consistency in collections.
Scene and Time-of-Day Fixes for Travel, Food, and Lifestyle Photos
Tailor lighting edits to situations by using presets and scenarios. Different lighting at events, meals, or on the road each need focused photo lighting fixes steps.
Create your own set of go-to presets or custom filters for repeat scenarios like morning breakfasts, golden hour walks, or museum interiors.
Step Sequence: Quick Fixes for Popular Scenarios
Travel: If skies turn white, drop highlights, boost blue saturation, and lift shadows gently. Get vibrant, detailed landscapes using the photo lighting fixes process.
Food: Sharpen contrast, increase vibrancy, lower overall exposure for rich, appetizing tones. Add structure—not just brightness—to emphasize textures and garnishes.
Lifestyle: For photos featuring people, favor skin tone corrections. Warm skin, soften shadows under hats, and brighten eyes for a welcoming, lively portrait style.
Realistic Example: A Coffee Shop Snap
You sit in a cozy coffee shop near a window. The photo looks half dark, half bright. Use selective lighting to lift only your friend’s face in the shadows.
This local correction keeps moody ambiance while making the main subject stand out crisply. The result feels organic, not overdone or artificial.
Bonus: Save this edit as a preset—”Window Brunch”—to use on future similar shots. Photo lighting fixes become quick habits, not chores.
Grouping Edits and Creating Everyday Photo Lighting Habits
Consistency across images requires grouping your photo lighting fixes into repeatable steps. Create an editing habit and every photo session becomes faster and more satisfying.
Save top adjustments as custom presets. Apply these before making custom tweaks. Presets give you a head start, while individual edits perfect each shot’s unique look.
Organizing Your Creative Workflow
Keep a simple checklist: Fix lighting, adjust color, enhance contrast, and fine-tune selectively. This routine covers all core photo lighting fixes every time.
Begin practice with three unedited images. Apply the checklist, saving each as a new file. Compare results and note which step brings the biggest improvement.
Share your workflow: Teach a friend your favorite routine to reinforce your skill and see the process from a new angle next time you edit together.
Scenario: Editing a Batch of Vacation Photos
Imagine you return from a beach trip, ready to create an album. Use batch-edit features in your app to process multiple shots at once for basic lighting and color.
Then select the best image and use manual tweaks for details. This way, your whole album stays unified, but favorites get standout attention through deeper photo lighting fixes.
End every editing session by reviewing your most improved photos. Mark the ones that inspired you in a “Best Fixes” folder for later reference or sharing.
Finishing Strong: Simple Photo Lighting Fixes Deliver Professional Results
Photo lighting fixes in mobile apps turn bland, uneven images into expressive, eye-catching memories. Each method and tool described here offers a skill you can practice and refine.
With practice, choosing the right fix—whether a filter, curve, or selective edit—becomes second nature. Consistent, confident editing creates albums that tell the story you meant to capture.
Make photo lighting fixes part of every edit. Over time, you’ll spot uneven light before the first tap, fixing it quickly for lasting impact. Keep experimenting and let your photos shine.